Hoboken Brownstone: Demolition
This is the second post in the series, Hoboken Brownstone. I plan to document the entire construction process so we'll start with the not so glamorous stuff... demolition!


The ceiling was 7'-0" from the existing slab and we wanted to get at least 6" more inches to make it livable per code. It was only a thin rat slab, which was buckled in some areas, so it needed to be repoured regardless. We hoped that the footings for the perimeter walls would be low enough that we could keep our slab elevation to the top of the existing footing and thus not need to do any underpinning or buttressing of the perimeter foundation. We made test holes in several places along the foundation. In some cases, like the photo above, we had a good foot before we hit the top of the footing. In other cases like the photo below, just 6"...


The fireplaces were kept in place at the front of the house like this one that would be in the future master bedroom. The load bearing stud wall also remained...

But ultimately, even this bearing wall would be replaced with new stud construction because the existing thick framing was wavy and not plumb, thus more difficult to sheetrock.

In most cases there was no subfloor with the finish floor attached directly to the framing. We would install new subfloor over this existing surface and then new wood flooring. The stair treads would all be modified to make up for the additional thickness and provide an equal riser height throughout.


Brownstone Street Facade
But first, we needed to do some exploratory work at the basement slab to finalize the drawings for the building department... and in our case zoning approval. As it currently stands in Hoboken, by renovating the existing unlivable cellar we were adding a floor to the house, which didn't meet the 3-story zoning for the R-1 area. It's an odd interpretation of the zoning and hopefully will be rectified soon. The purpose of the story requirement in zoning is to limit extra height and floors so the street facade continuity is maintained. But that discussion is for another post. The good news was... we were given zoning approval and the okay to fully finish the basement.

Test Hole Rear
The ceiling was 7'-0" from the existing slab and we wanted to get at least 6" more inches to make it livable per code. It was only a thin rat slab, which was buckled in some areas, so it needed to be repoured regardless. We hoped that the footings for the perimeter walls would be low enough that we could keep our slab elevation to the top of the existing footing and thus not need to do any underpinning or buttressing of the perimeter foundation. We made test holes in several places along the foundation. In some cases, like the photo above, we had a good foot before we hit the top of the footing. In other cases like the photo below, just 6"...

Test Hole Front
So rather than stepping the slab relative to the footing, we decided to keep it all at one level since we were able to gain the 6" we were looking for. As we moved away from the footing, we dug more to allow for a good gravel bed, insulation, and a perimeter drainpipe that would be connected to a sump pump.
Once we had our permits the demo began. Let's start at the bottom, the basement...

Basement toward front
The cellar had a series of old stall-type storage partitions that needed to be demolished and removed. Then the systems equipment was disconnected and services were capped. The pieces of equipment were like archaic monsters... the kind of things found in your childhood basement that you'd have nightmares about!
Once all was cleared out, the slab was jack hammered, as well has the hard packed earth underneath. All was hauled out in buckets to the dumpster out front... one of the many you see around town.
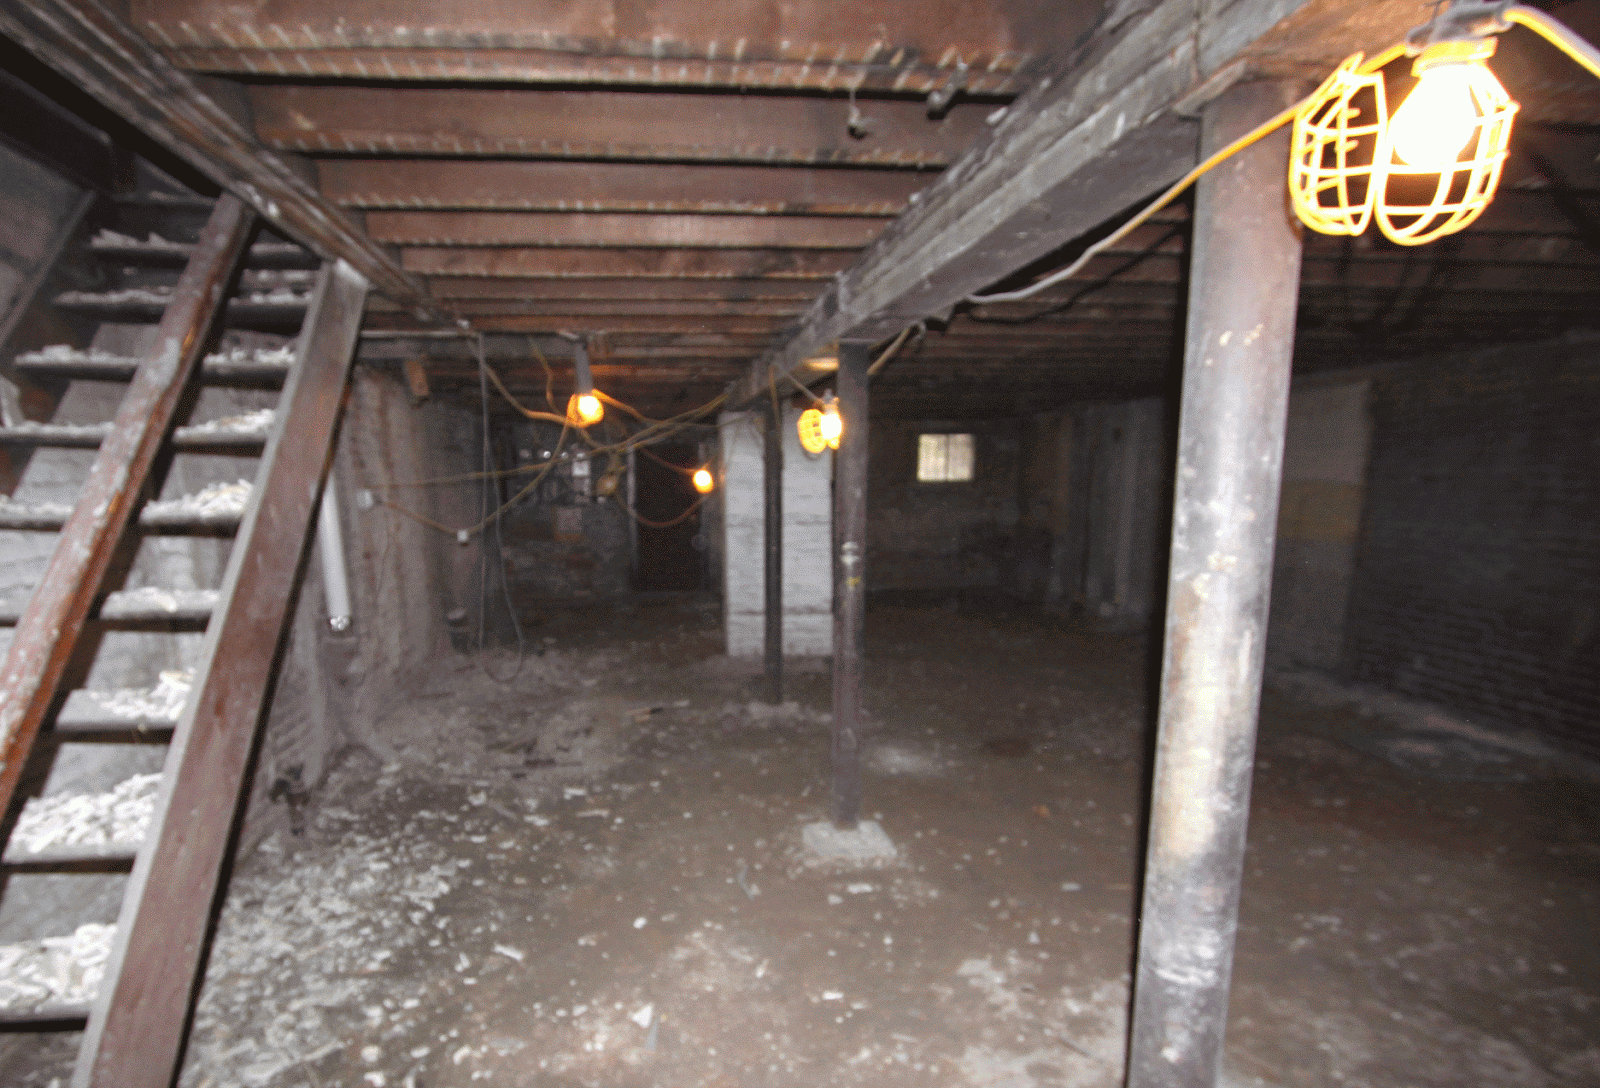
Cellar towards rear
Later we would address the structure once the new slab and footings were poured. The beam and pipe columns seen in the above photo would get removed because the timber member, connections and footings were not adequate to hold the three floors above. Also we wanted to upturn the beam, meaning we would cut the joists so the steel would be set within the floor depth and allow for a clean flat ceiling at the finished basement.
At the First Floor, you can see that the interior walls were made of thick studs, wood lath and plaster... typical for a house this age in Hoboken. It makes for a lot of debris!

Backside of Vestibule
In this photo, you see where the masonry chimney was removed. This was at the rear of the house on the First Floor where the kitchen will be located. The chimney projected from the wall a good bit and we didn't want to lose the straight run for cabinetry. We talked about supporting the chimney that continued at the upper floors but it was more economical to remove the masonry at every floor.
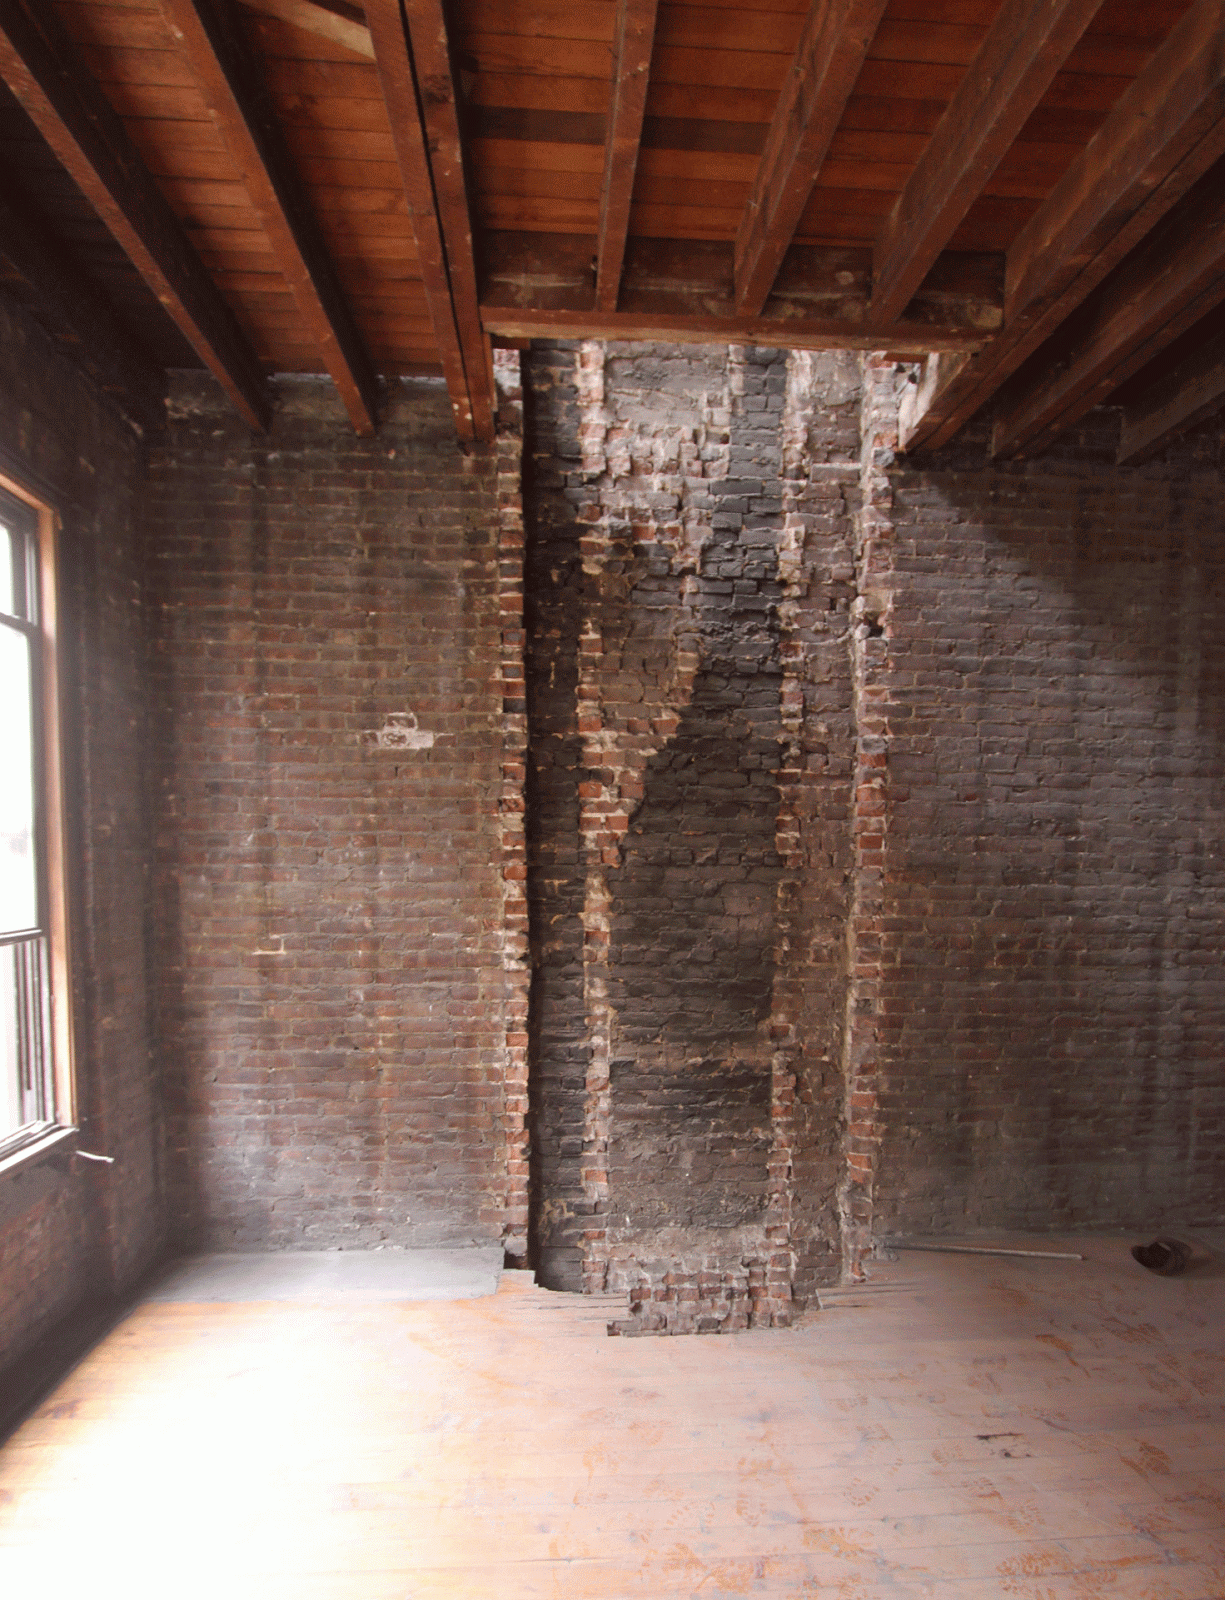
Masonry removed at Kitchen
The fireplaces were kept in place at the front of the house like this one that would be in the future master bedroom. The load bearing stud wall also remained...
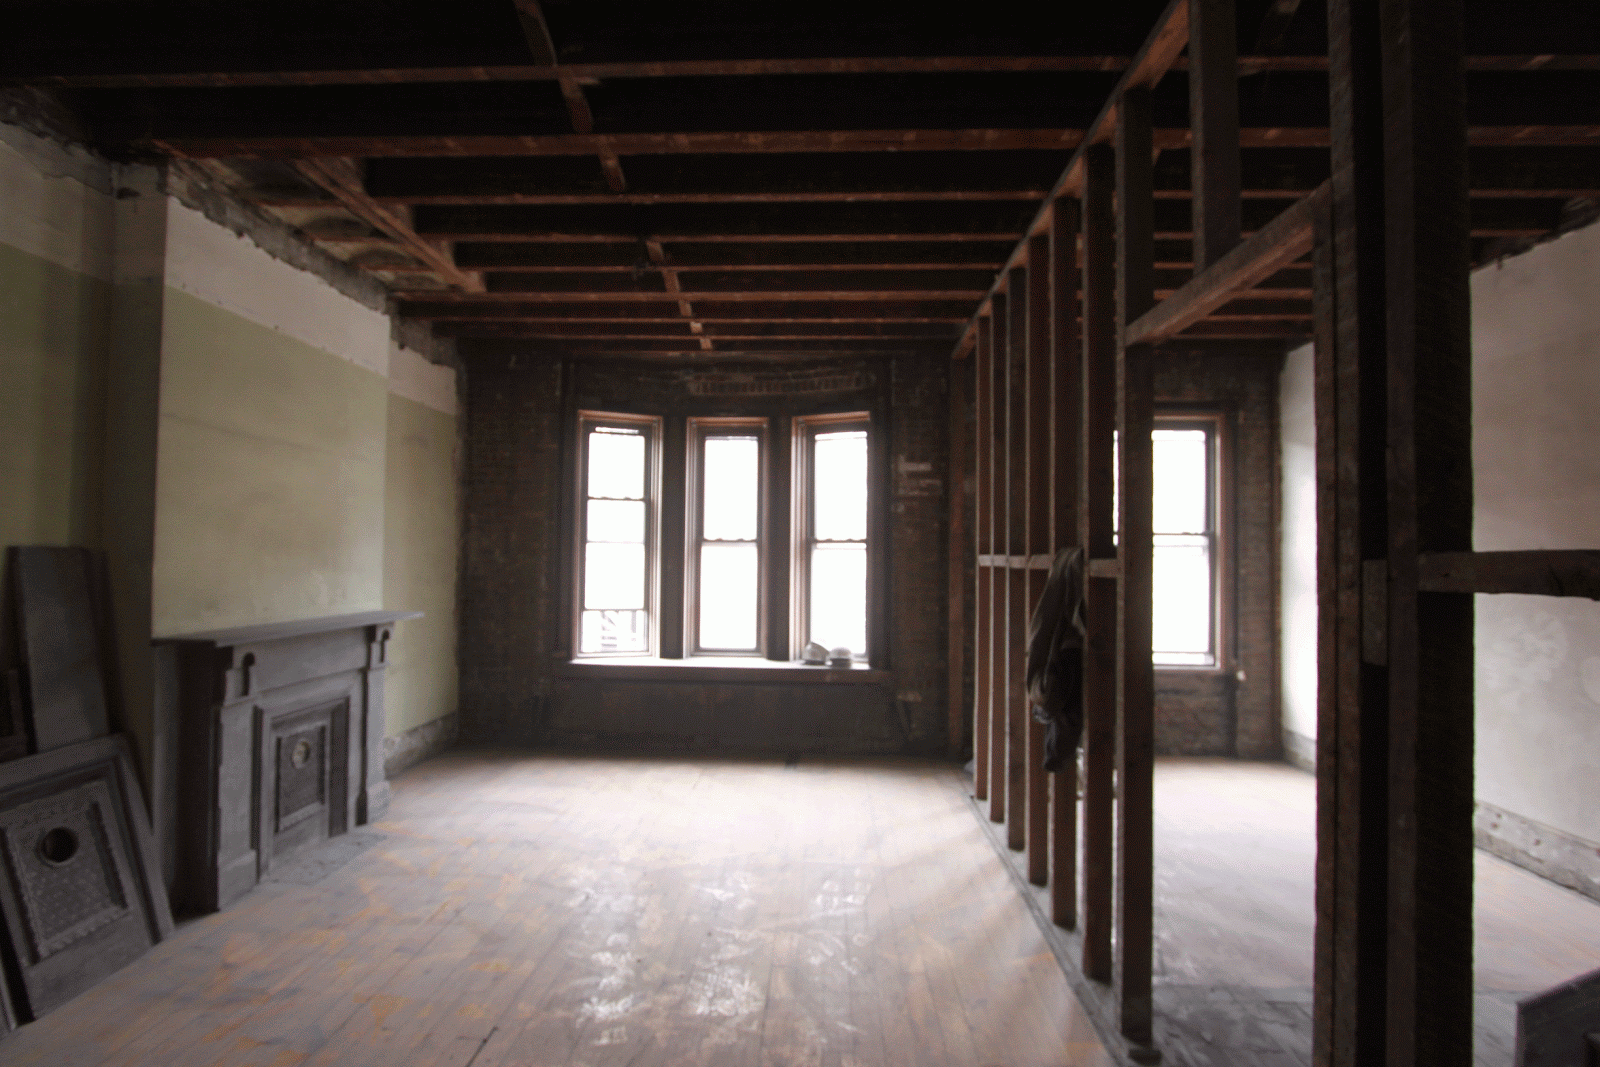
Master Bedroom Bay Window
But ultimately, even this bearing wall would be replaced with new stud construction because the existing thick framing was wavy and not plumb, thus more difficult to sheetrock.

Bearing Wall at Second Floor
In most cases there was no subfloor with the finish floor attached directly to the framing. We would install new subfloor over this existing surface and then new wood flooring. The stair treads would all be modified to make up for the additional thickness and provide an equal riser height throughout.
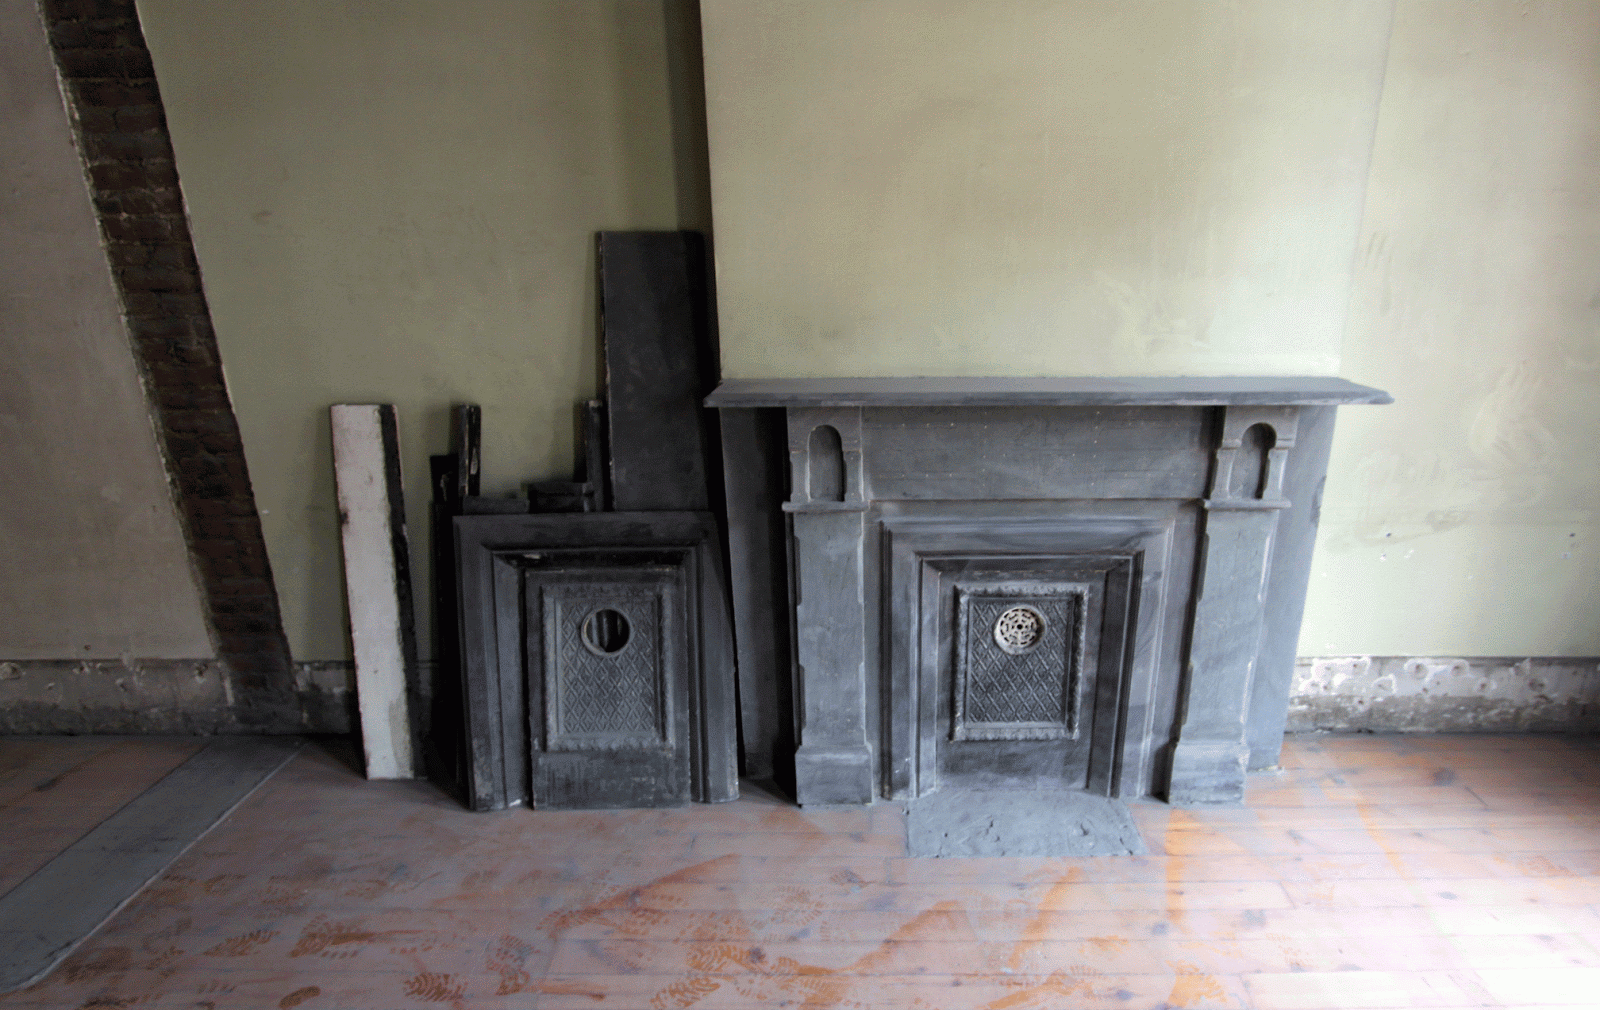
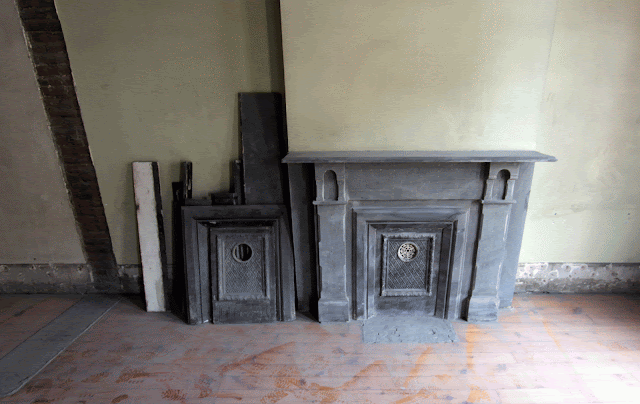
Master Bedroom Fireplace Mantel
The master bedroom fireplace surround will get dismantled so it can be refinished off-site and then reinstalled. The insert covers were also removed and ultimately the firebox will be open and cleaned up with a black painted interior.
Through this opening in the floor, you can see the skylight that had been located over a light well that housed those bathroom vent pipes extending up to the roof. All plumbing, waste lines and vent pipes were removed.

Old Chase Skylight Above
This is a great photo at the top floor... with the skylights white washing the old brick party wall with natural light...

Third Floor
There had been a bathroom on each level where you see the flooring is removed. The structure had been butchered to run piping and waste lines. All new framing would be needed for adequate support. The cavities in the brick wall would also be filled with new masonry. In future photos, you'll see that the masonry party walls will be covered with metal furring to run electrical and plumbing.

Old Bathroom Floor
The ceilings were removed at the top floor. You can see the old plaster line on the wall...

Third Floor Front
I loved the feeling on the Third Floor with its high roof framing, skylights and open space. Would make for a great brew pub... not that Hoboken needs any more bars!

Third Floor Rear
The roof deck required some repair but for the most part it was in good condition and the members were adequately sized. There was some previous water damage where the roof drainage trough was located. We kept the roof pitch and drain location, but areas of damaged substrate were replaced and all new roofing and flashing installed.

Roof Repair
All the existing windows would be removed once the new windows were on site. Here you can see the unfortunate faceted cladding that would be removed to allow for new full glass round top double hung windows.

Faceted Window Cladding
The rear fire escape could be dismantled now that a three-family was becoming a one-family. The paint on the back facade would be power washed and the brick wall repointed.

Rear Facade
So that's the demo! You can see it was quite extensive with just a shell and the floors remaining. One might have tried to renovate the building in a way to keep the old intact. But given that it was originally a three-family and each floor was chopped up into small rooms, the layout would not be practical for a single family today. Much of the plaster and trim work was already in poor condition and modifying the wall locations and installing new systems would have butchered almost every surface.
It's something that needs to be taken into consideration when buying an old home... think about how much you would change the layout, what needs to be upgraded, how pristine you want your finishes and what's your budget. Then it will become more apparent whether you're talking about a gut renovation or a restoration.